Our online window and door quote designer is simple to use, it enables you to directly input your sizes, choose the style you need, the colour you require and your glazing options. The system then generates an instant quote and the option to purchase now or save your quote to amend or buy later. We've even provided a step-by-step tutorial below that guides you through the process. Should you need any help during the process then call our customer support team and they will give you further assistance.

Step One - Dimensions
Enter your measurements in the dimension boxes. This should be your overall width and height of your window frame in millimeters and include any cills and knock-ons. In normal terms we would recommend allowing 10mm overall tolerance to the width and height to ensure the frame sits within the window opening. Once you have added the measurements - click the green "NEXT" button.
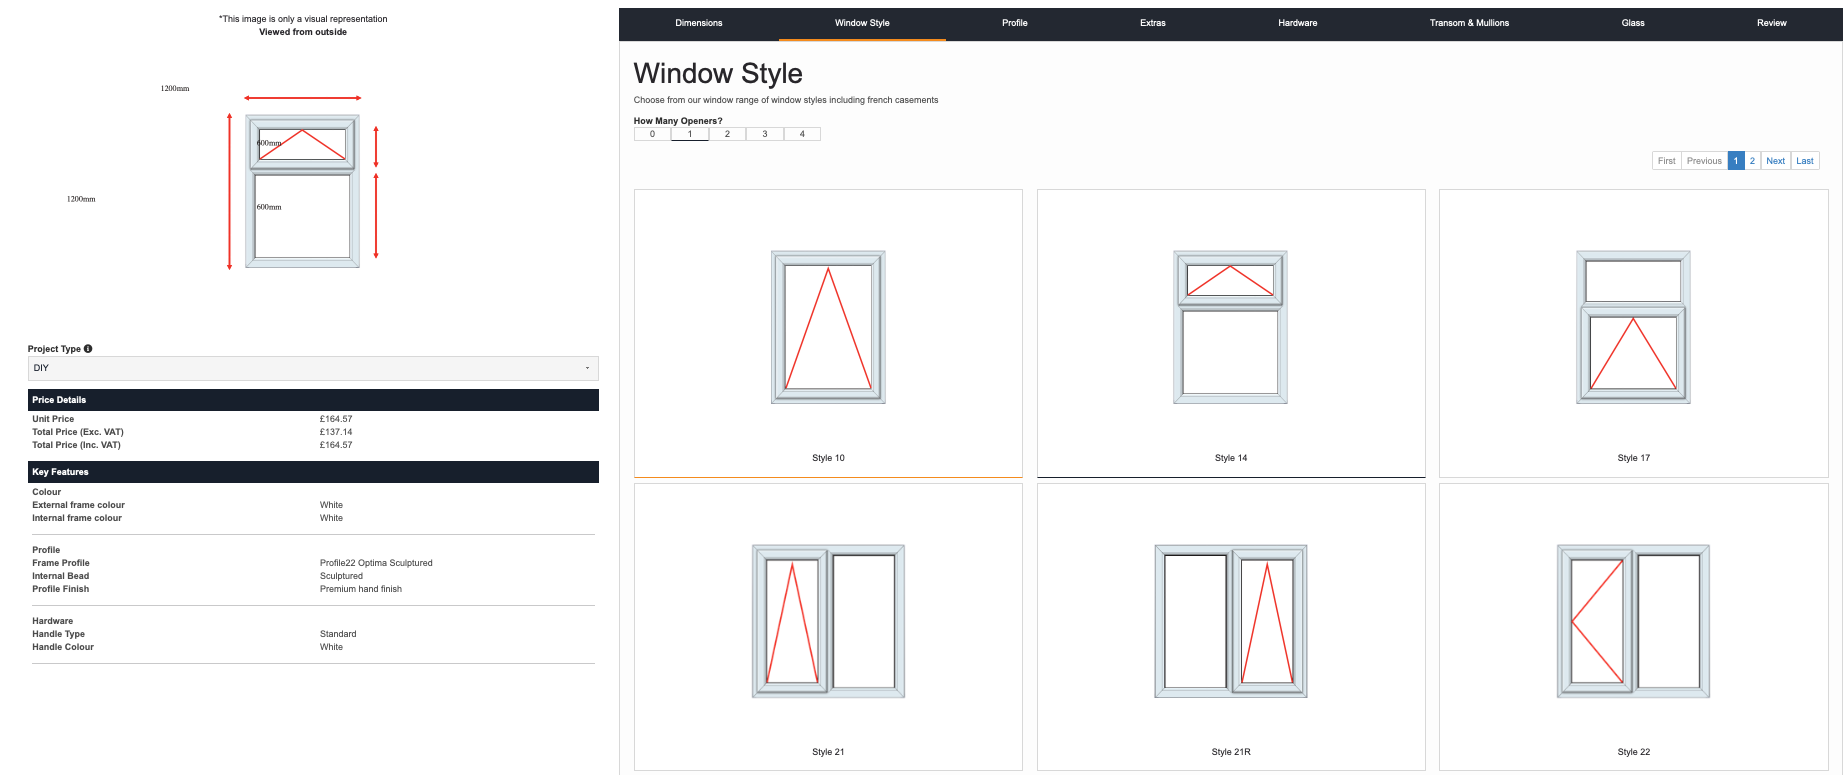
Step Two - Window Style
In the Windows Style section you select your preferred window style and openings. Using the sliders under each section you can explore the full range of options available within your size limitations. When you select one of the windows, it will appear in the left hand panel, with the costs and key features - this will change as and when you add certain options. You also have the ability to view all styles within the sections. If we haven't offered the style of product you want on the designer, you can download a measuring sheet for the product, draw the design you are looking for in as much details as possible and then upload you file. This will notify the team who will get in touch as soon as possible with a price. Once you have finished, then click the Green Next button.
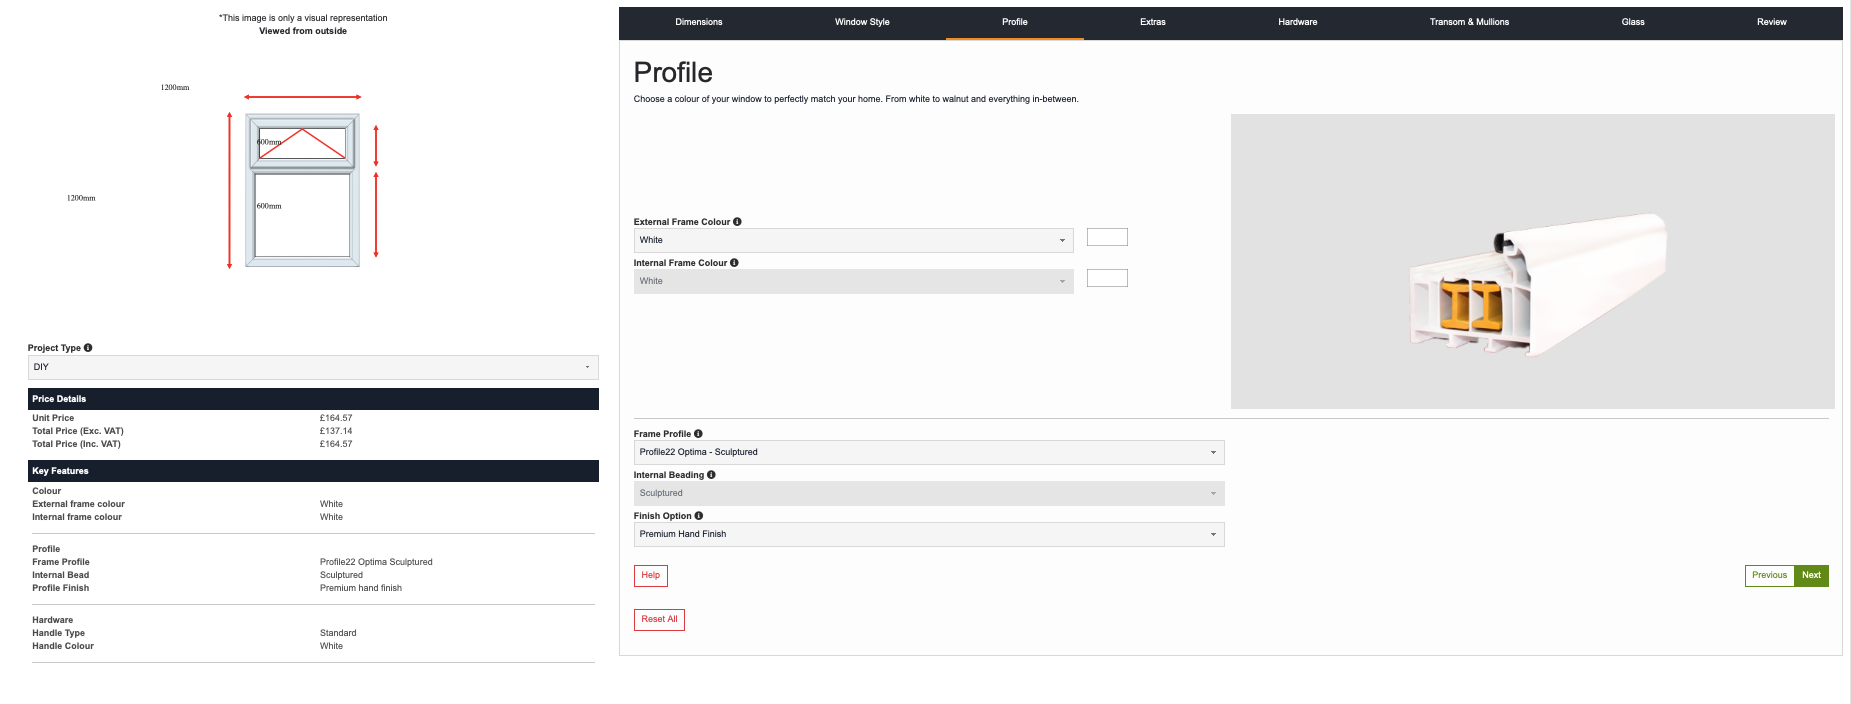
Step Three - Colour and Profile
In the Profile selection you can now select the colour of your windows to perfectly match your home. We carry an extensive range of colours and can also bespoke match a specific colour too. You will need to select the external and internal colours. You will also need to choose the profile shape - either sculptured or chamfered. The image will change so you can see what you have selected. Once you have finished, then click the Green Next button.
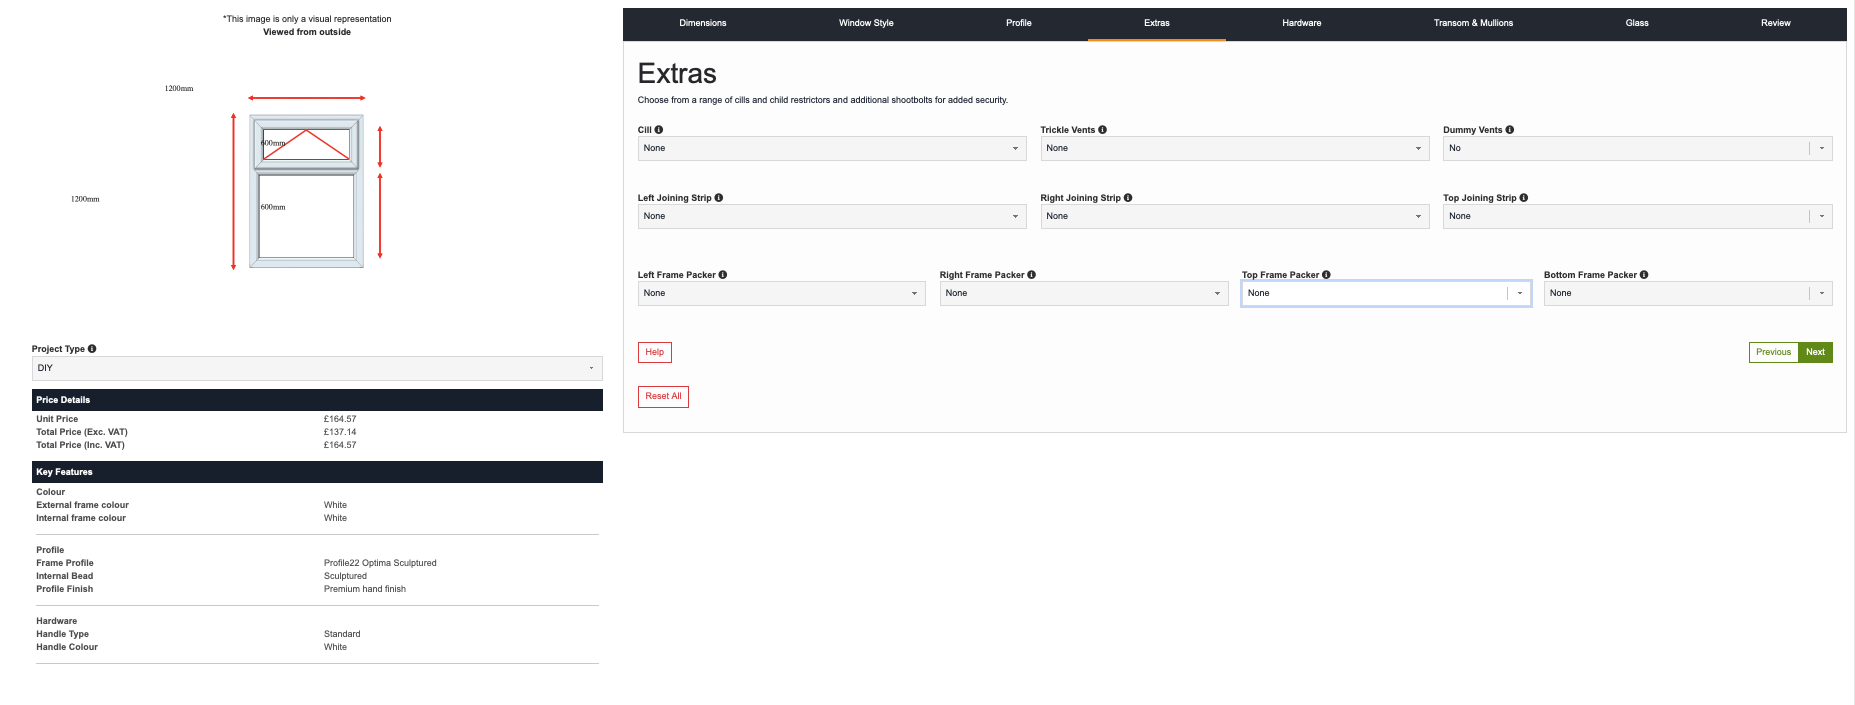
Step Four - Extras
Within the Extras section you will be able to see and add any optional extras available for your windows. By selecting the small blue info button you can get additional information about what each of these options are and do. Once you have finished, then click the Green Next button.
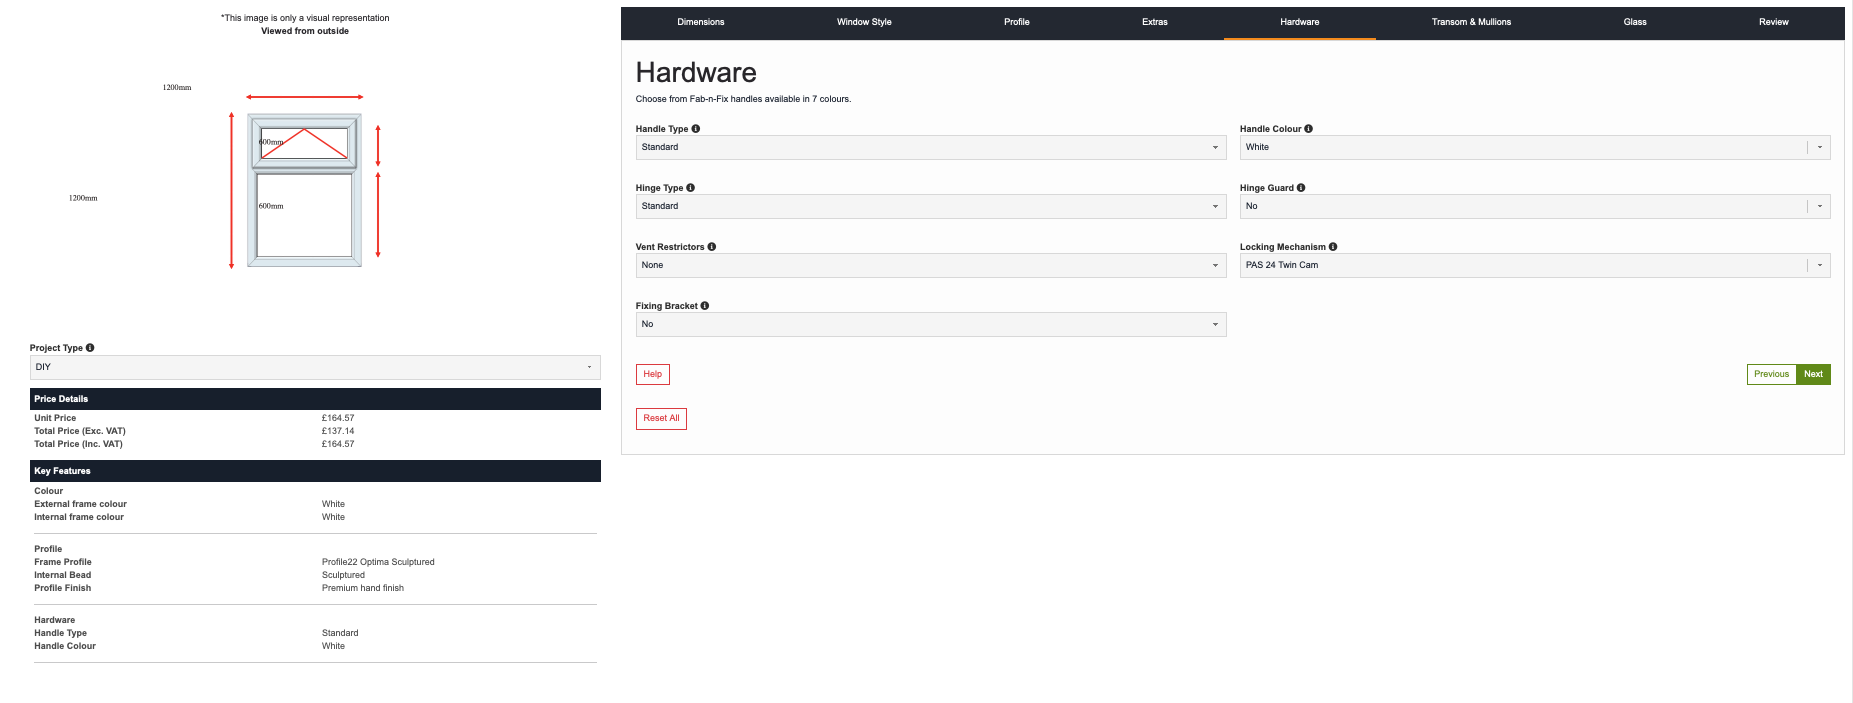
Step Five - Hardware
In the Hardware section you can select your handle type and colour, hinges and if you require fixing straps. Once you have finished, then click the Green Next button.
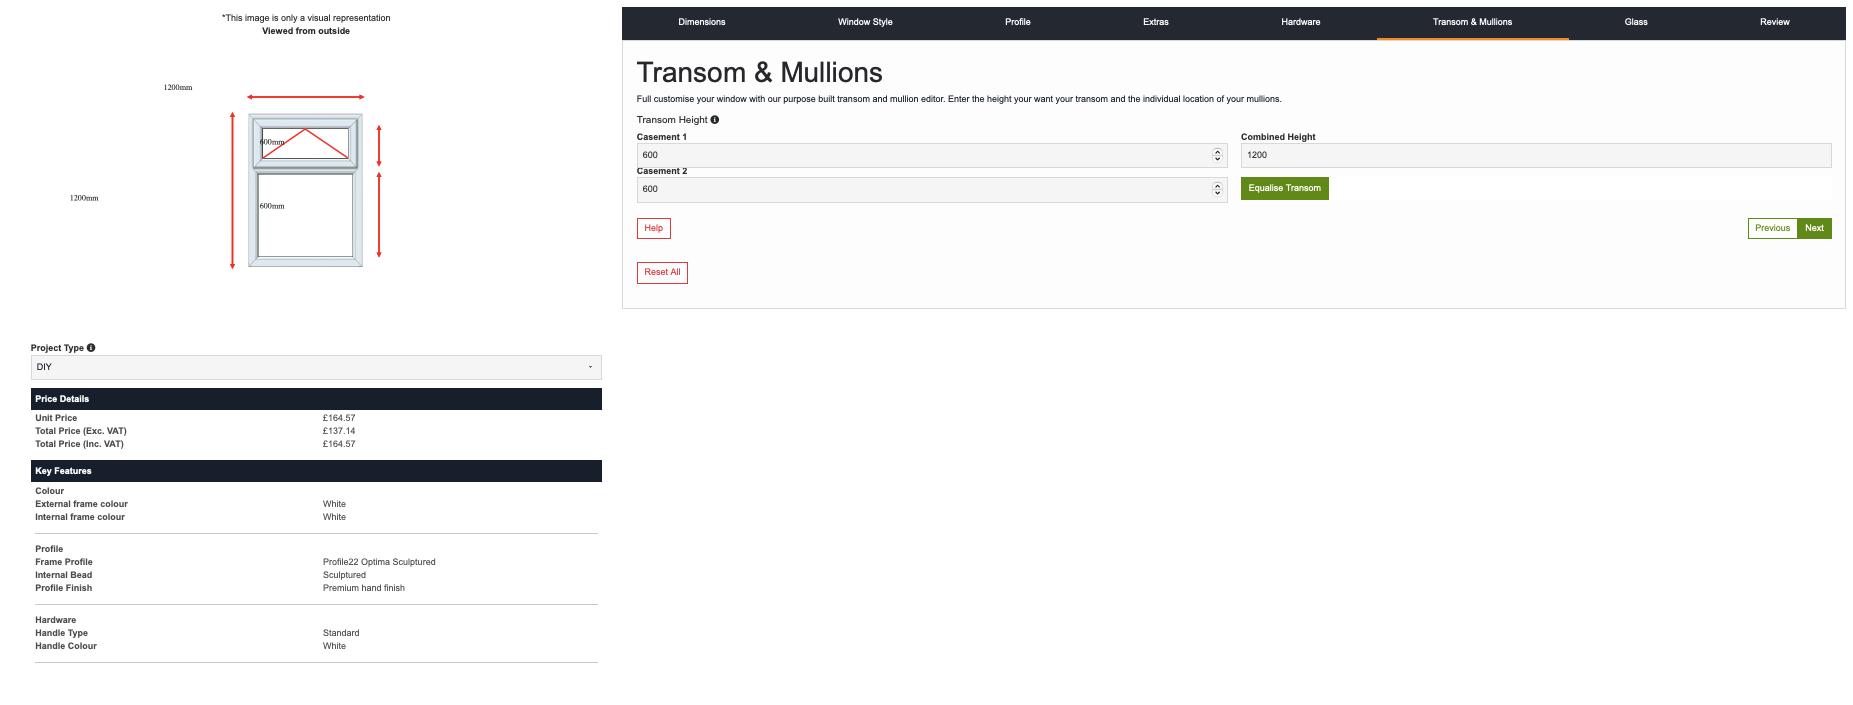
Step Six - Finite Design
Within the Finite Design section you can fully customise your window with our purpose built transom and mullion editor. (Transom is the horizontal bar / Mullion is the vertical bar) Enter the drop your want your transom and the individual location of your mullions. We centralise the mullion bar as standard. Once you have finished, then click the Green Next button.
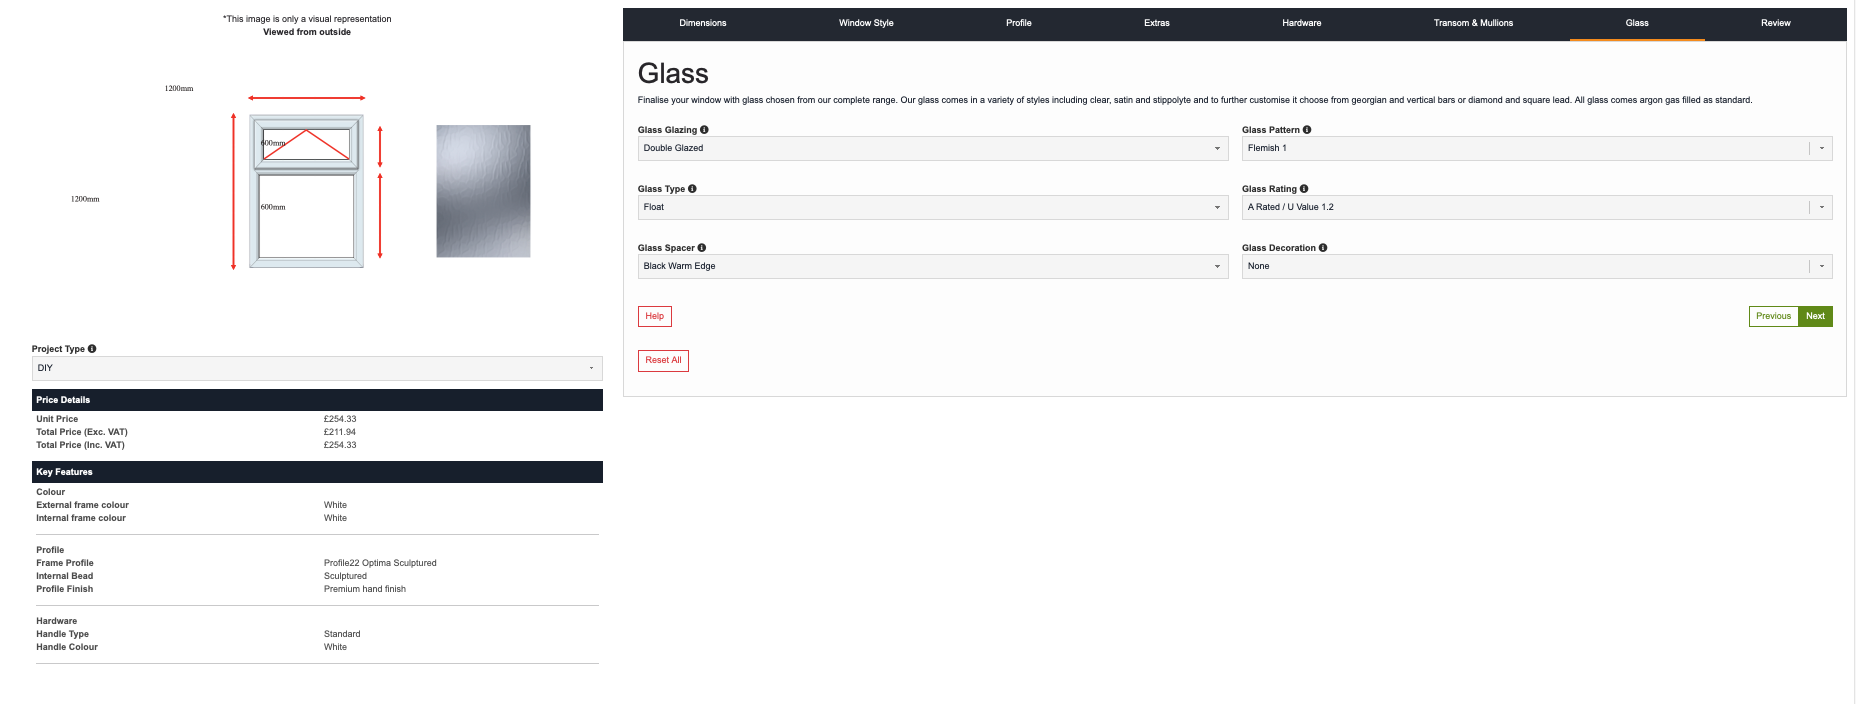
Step Seven - Glass
Finalise your window with glass chosen from our complete range. Once you have selected the double or triple glazed option then the remaining options will become available. Our glass comes in a variety of styles including clear, satin and stippolyte and to further customise it choose from georgian and vertical bars or diamond and square lead.Once you have finished, then click the green Next button.
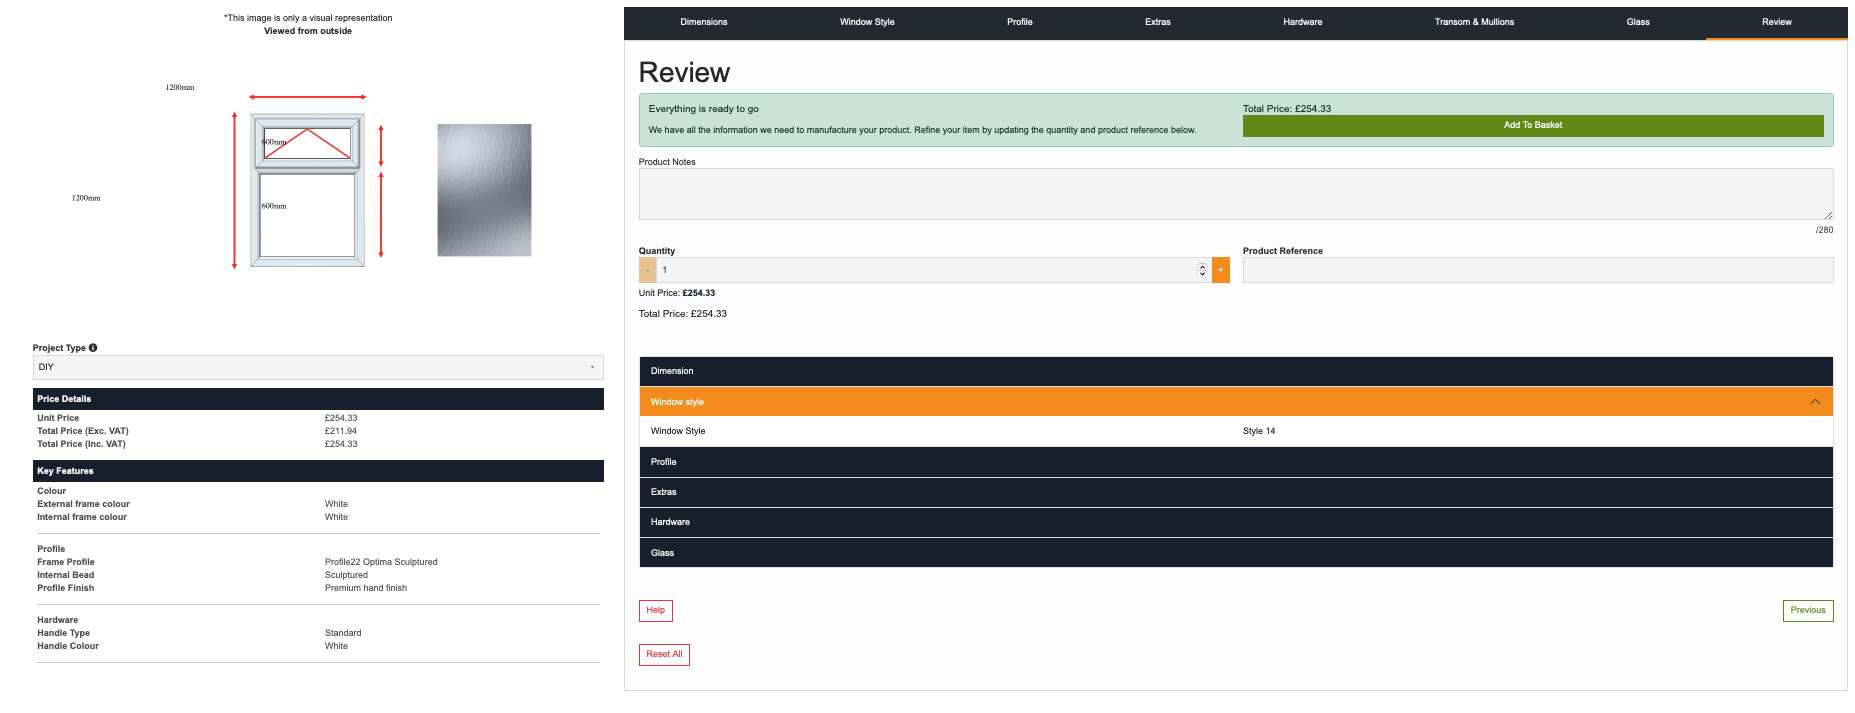
Step Eight - Review
The final stage is the review section - here you will run through the final design and specification before you add the window to your basket before purchasing. If you need to change anything, now is the stage to do it. You can use the tabs across the top to get back to the relevant section, once you have made the changes it then updates the review section. If everything is correct click the add to basket, then either start the design of another window, or go to the checkout to purchase the window you have just designed.
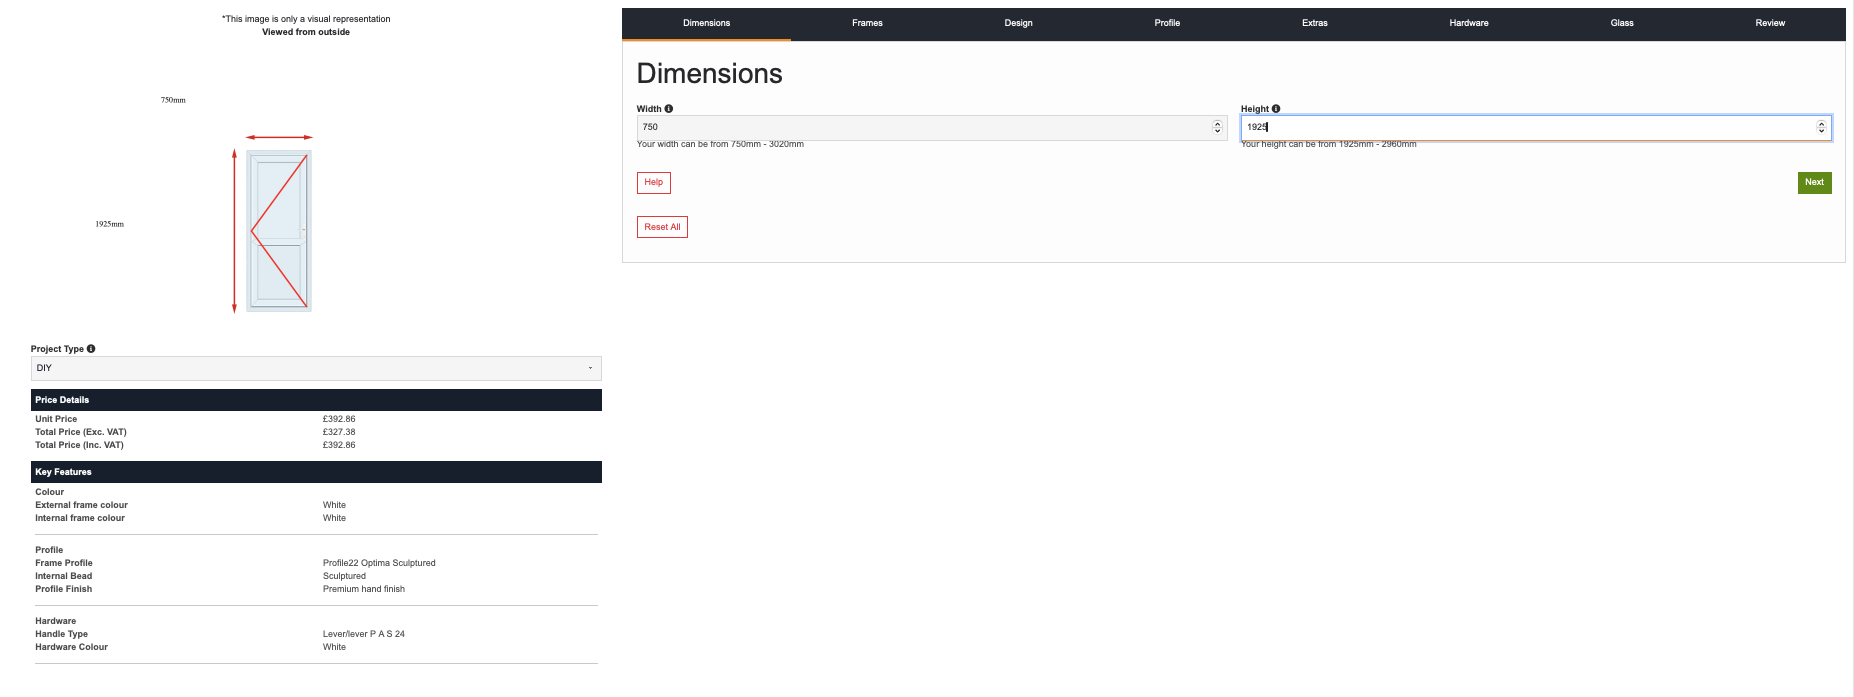
Step One - Dimensions
Enter your measurements in the dimension boxes. Please note the restrictions on measurements for no-frame and frame plus the height of the door too, as some door openings will require an additional top-light. Once you have added the measurements - click the green NEXT button.
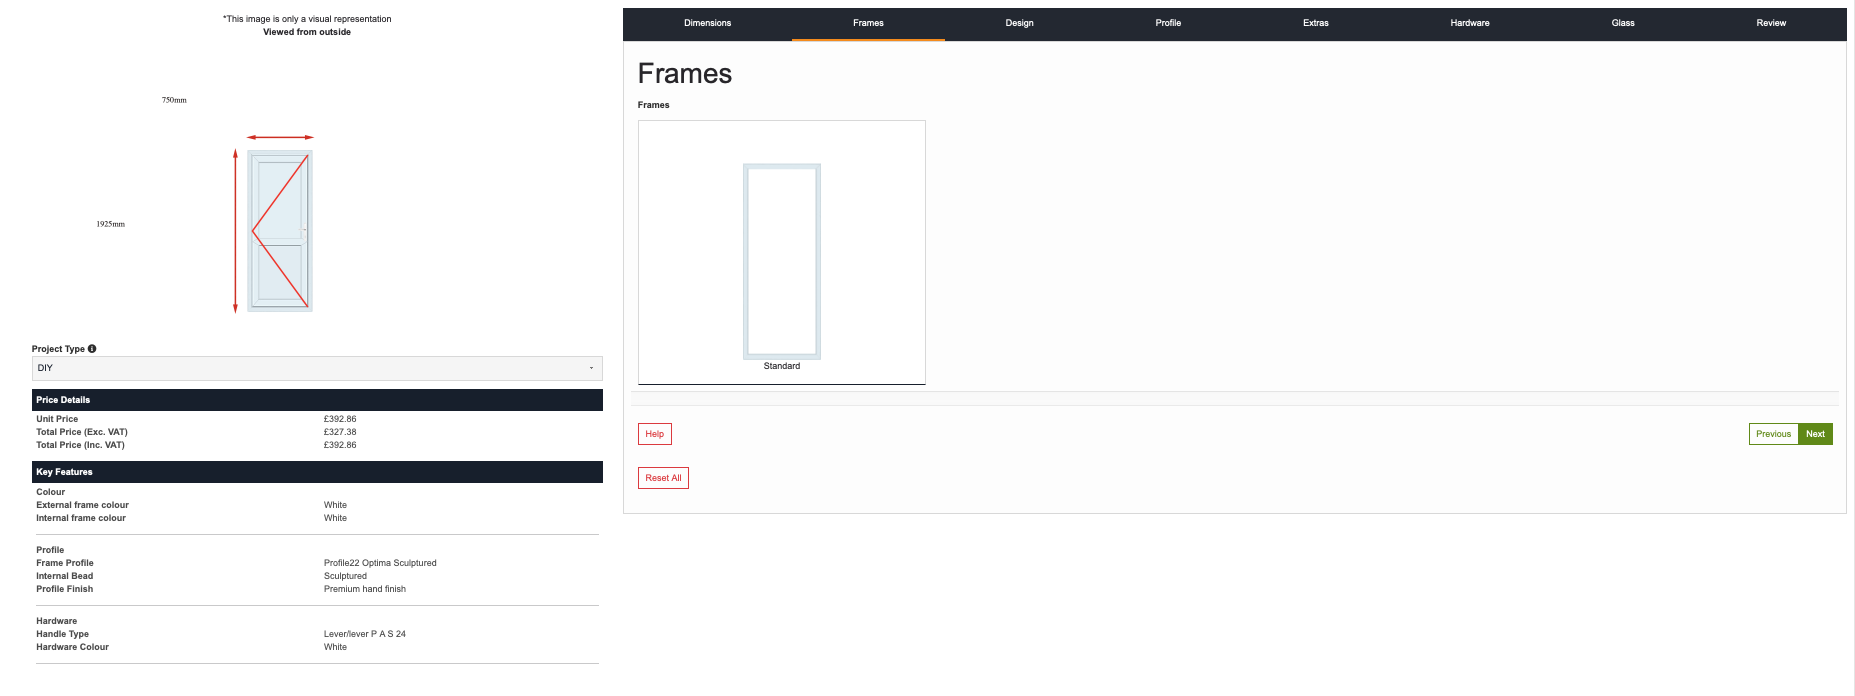
Step Two - Frame Design
In the frame design section you will be able to pick your frame style from the selection shown. Once you have selected this, click the green NEXT button.
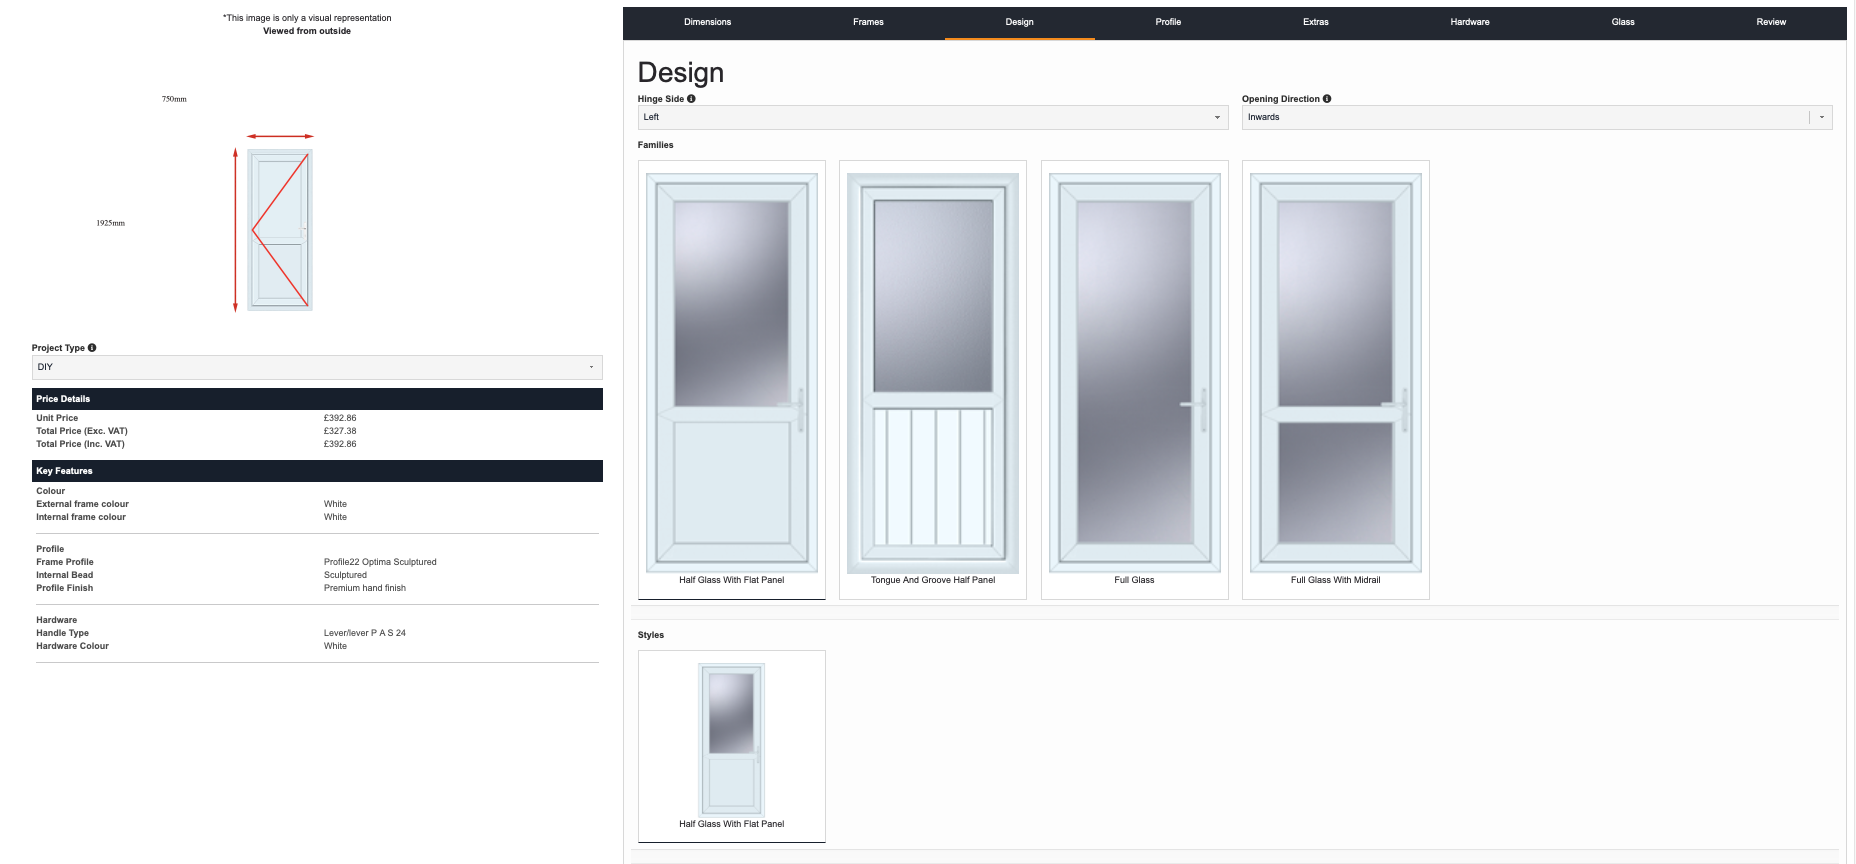
Step Three - Panel Design
In the frame design section you will be able to pick your frame style from the selection shown. Once you have selected this, click the green NEXT button.
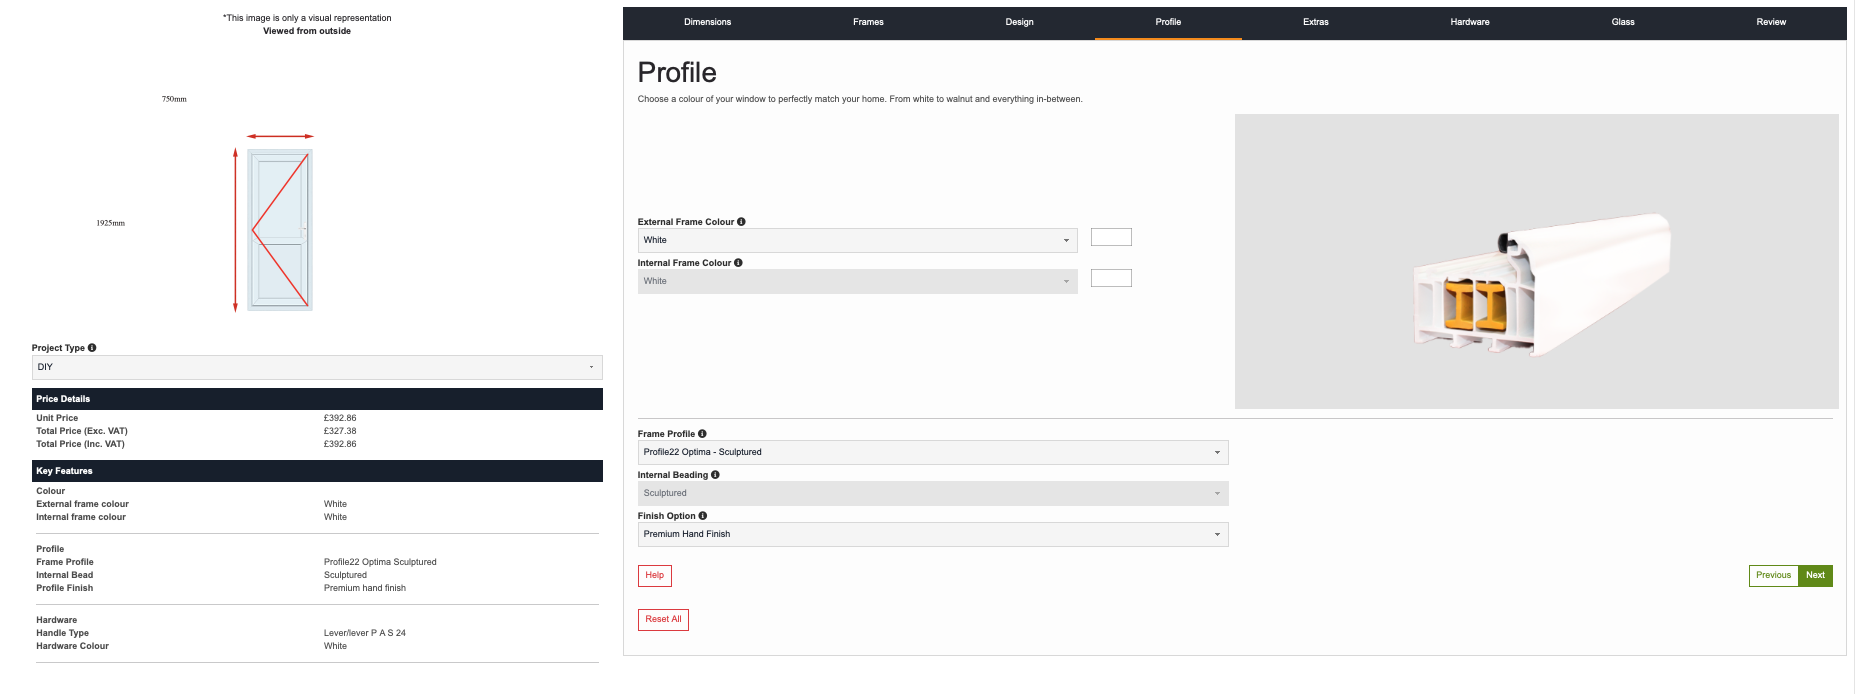
Step Four - Profile and Colour
In the Profile selection you can now select the colour of your doors to perfectly match your home. We carry an extensive range of colours and can also bespoke match a specific colour too. You will need to select the external and internal colours. You will also need to choose the profile shape - either sculptured or chamfered. The image will change so you can see what you have selected. Once you have finished, then click the Green Next button.

Step Five - Extras
Within the Extras section you will be able to see and add any optional extras available for your doors. By selecting the small blue info button you can get additional information about what each of these options are and do. Once you have finished, then click the Green Next button.

Step Six - Hardware
In the Hardware section you can select all your additional hardware options for your door. You will also be able to choose your lock type too and house number number too. Once you have finished, then click the Green Next button.
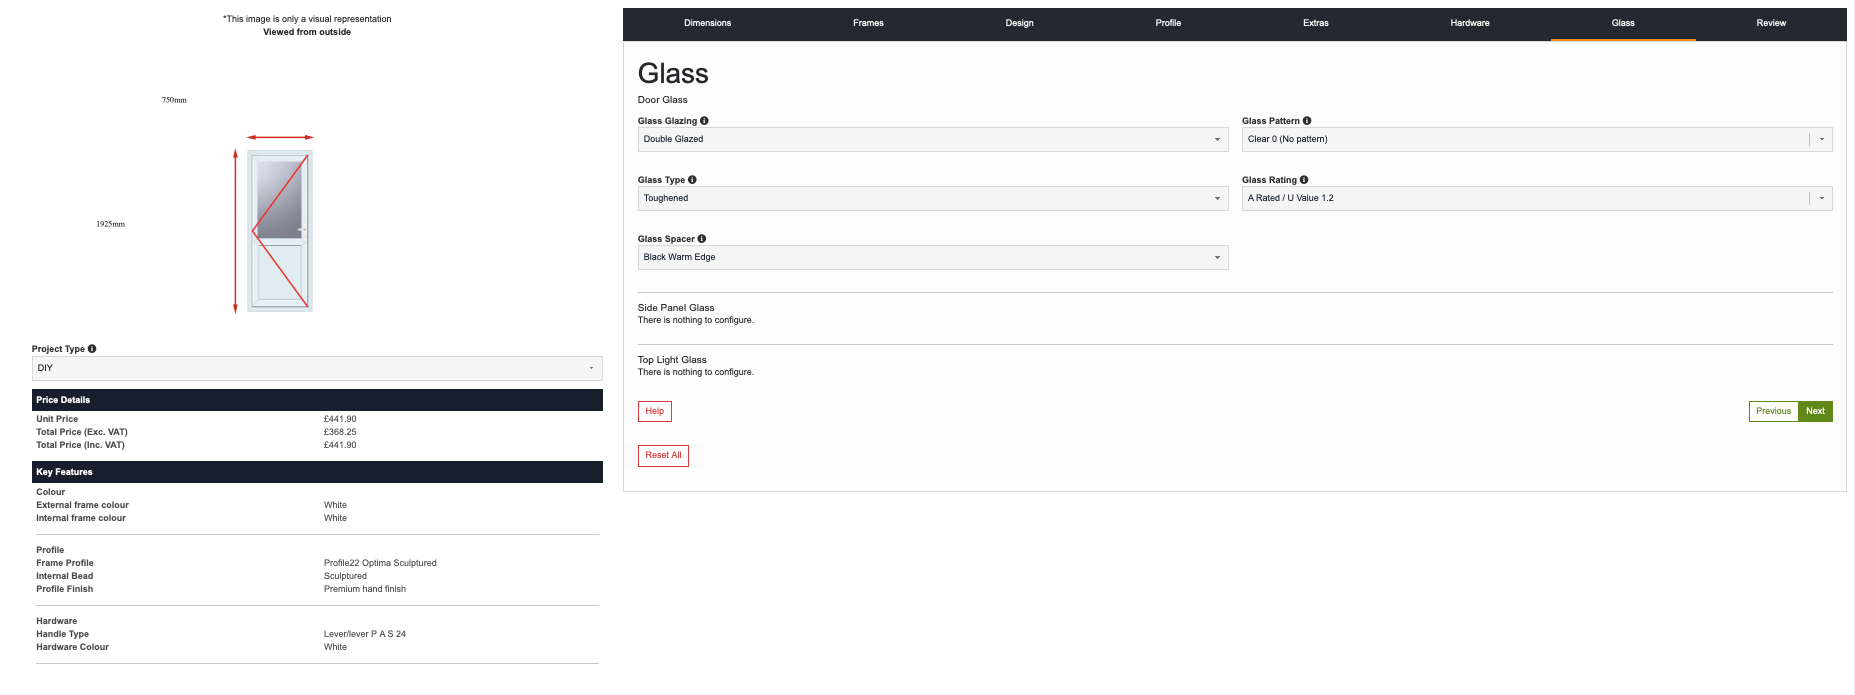
Step Seven - Glass
Finalise your door with glass chosen from our complete range. Our glass comes in a variety of styles including clear, satin and stippolyte etc. You will also have to select any top light and side panel glazing if required. Once you have finished your selection, then click the green Next button.
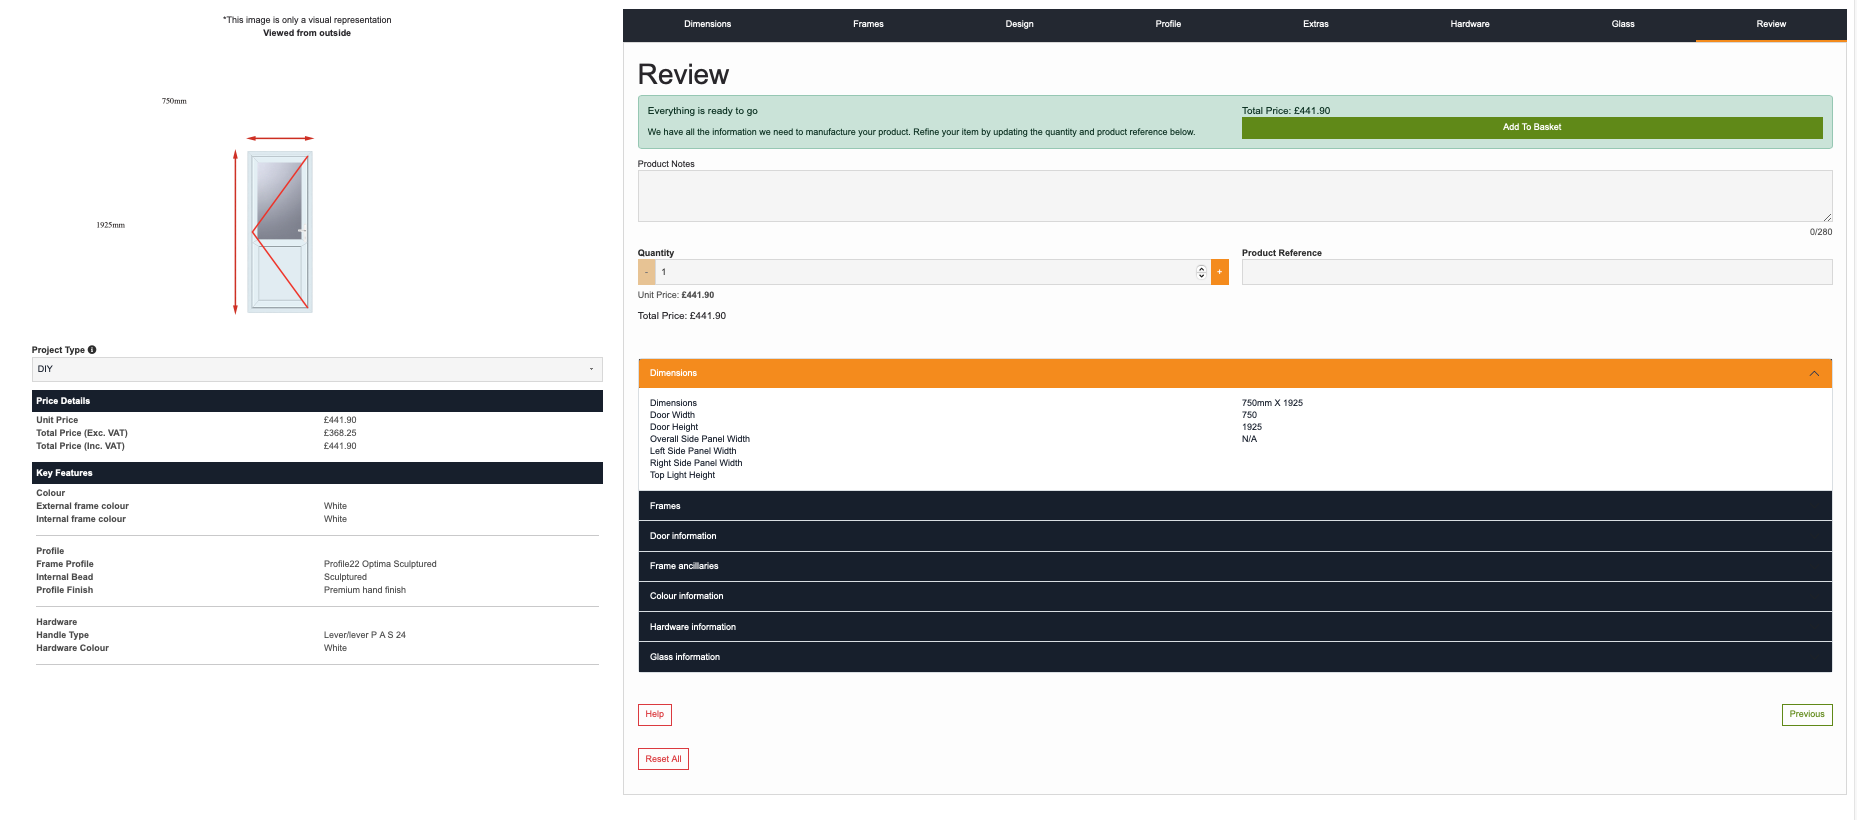
Step Eight - Review
The final stage is the review section - here you will run through the final design and specification before you add the door to your basket before purchasing. If you need to change anything, now is the stage to do it. You can use the tabs across the top to get back to the relevant section, once you have made the changes it then updates the review section. If everything is correct click the add to basket, then either start the design of another door, or go to the checkout to purchase the door you have just designed.